If the intriguing title “Difference between FDM, SLA, & SLS in 3D Printing” has piqued your interest, you’re likely either naturally curious or well-versed in the technical acronyms. If the latter is the case, it suggests you’ve delved into the expansive world of 3D printing and likely have hands-on experience with various materials.
However, we intend to keep the general info simple so even beginners can understand, follow, and get valid assistance in their quest for the appropriate material and processes to complete their 3D project in the best way possible.
In 3D printing the process where an object is produced by adding material layer upon layer is widely known as Additive Manufacturing or AM. So far there are three types of AM processes namely – FDM, SLS and SLA – each holding different features and functions, so it is imperative to get the know-how prior to purchasing.
Read on to access precious key knowledge which will enhance your expertise to that of a connoisseur while improving your 3D printing craft in the process.
FDM – Fused Deposition Modeling
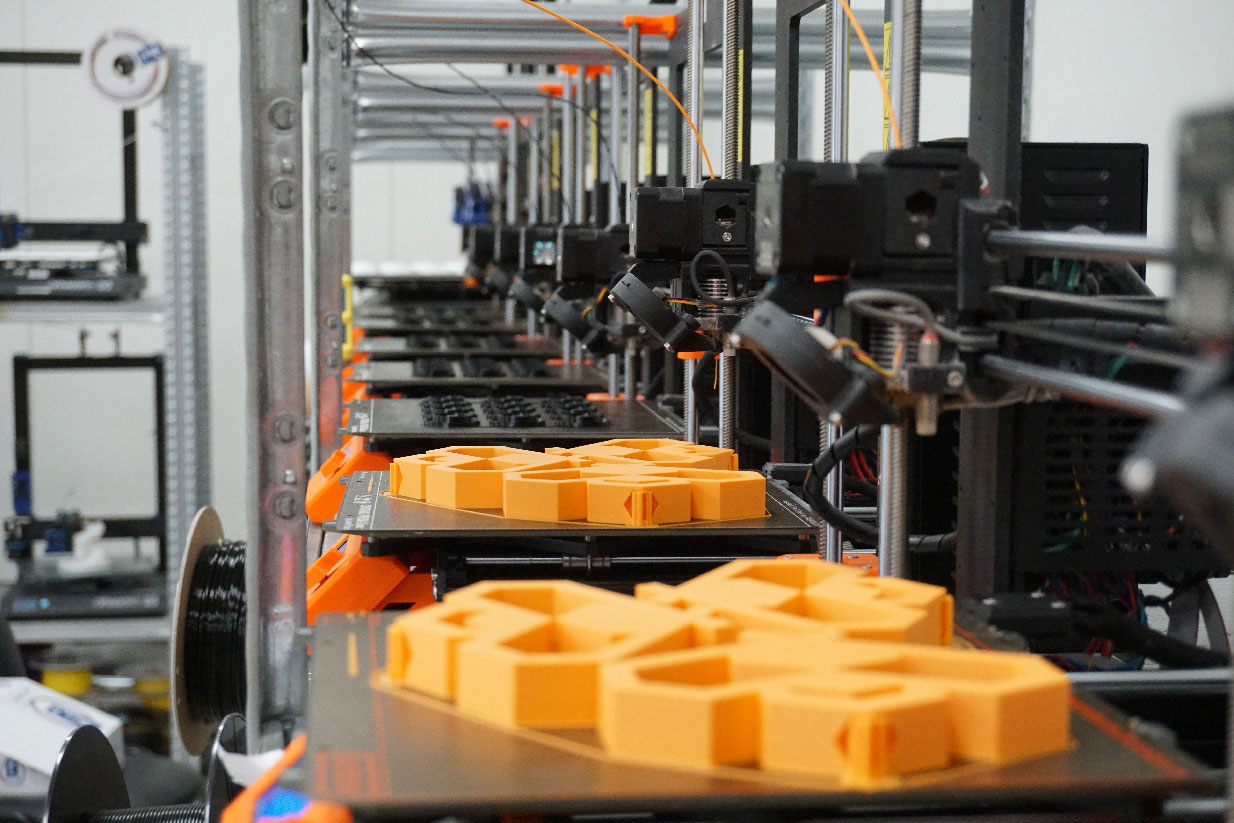
FDMs are one of the most popular choices not only because they are easy to learn, but also because they offer a medium-fast process, while the printer does not require a big space so it is ideal for home or offices. Having said that, it can be found in the form of a big industrial machine too supporting manufacturing processes.
Fused Deposition Modeling is also known as Fused Filament Fabrication or FFF. The name suggests filaments, however industrial ones use pellets rather than filament. FDM/FFF is one of the best-known technologies in this field forming part of the Material Extrusion process, where it uses thermoplastic materials usually in spools of filaments, while the heated nozzle melts the material which is consequently deposited onto a substrate.
FDM struggles where any hollows, undercuts or hangings feature in the model, thus it needs to be accompanied by a computer-aided design (CAD) or 3D computer graphics software, as support structures like boxes, ceilings or webs must be crafted to enable models to be printed.
One or more extruders can be used, however in the case of multiple extruders the process could take more time to finish. They do aid in creating supporting designs which dissolve in water, but sometimes you will need more than just water, like citric acid.
Pertinent to note that not all printing material sticks to the dissolving support material, while one needs to consider the model orientation on the platform which must be arranged in a way that doesn`t need a lot of supports.
SLS – Selective Laser Sintering
This technique holds a long history in 3D printing and involves a laser which beam sinters powdered material in a sealed pre-heated chamber, set just below the melting temperature of the powder, occasionally an inert gas atmosphere is included to avoid oxidation. The laser then will add that little remaining amount of energy to melt the powder.
Platforms are then repositioned once the layer sintering is complete while dedicated gears replenish the layer of powder from a supply compartment into the printing one, consequently repeating the process. The unsintered powder supporting the printing in the chamber becomes a support itself, thus in SLS no supports are needed.
Needless to say, the laser is the protagonist in this method, as its diameter and laser directing determine the accuracy, however the layer height affects too. Laser routing can be H-BOT (perpendicular to the layer) or Galvo (at an angle to the layer).
SLS holds no boundaries as even complex models can be printed also with moving parts, as long as the designed object enables the elimination of the unsintered powder in the item by simply vacuuming, brushing, or sandblasting.
SLA – Stereolithography
This is the second most popular process, and it entails a photopolymer resin which is exposed to a laser beam or digital light projector hardening the material layer-by-layer on the platform, subsequently a flood of resin covers the surface
To avoid ambient light from curing the process prematurely it`s paramount that the chamber is opaque or tinted, while the material is enclosed to avoid resin fumes.
In this method support structures are also needed but they are similarly made from resin which excess is washed away with solvent once the printed object is complete. UV light will then cure the object, while support structures need to be removed by cutting.
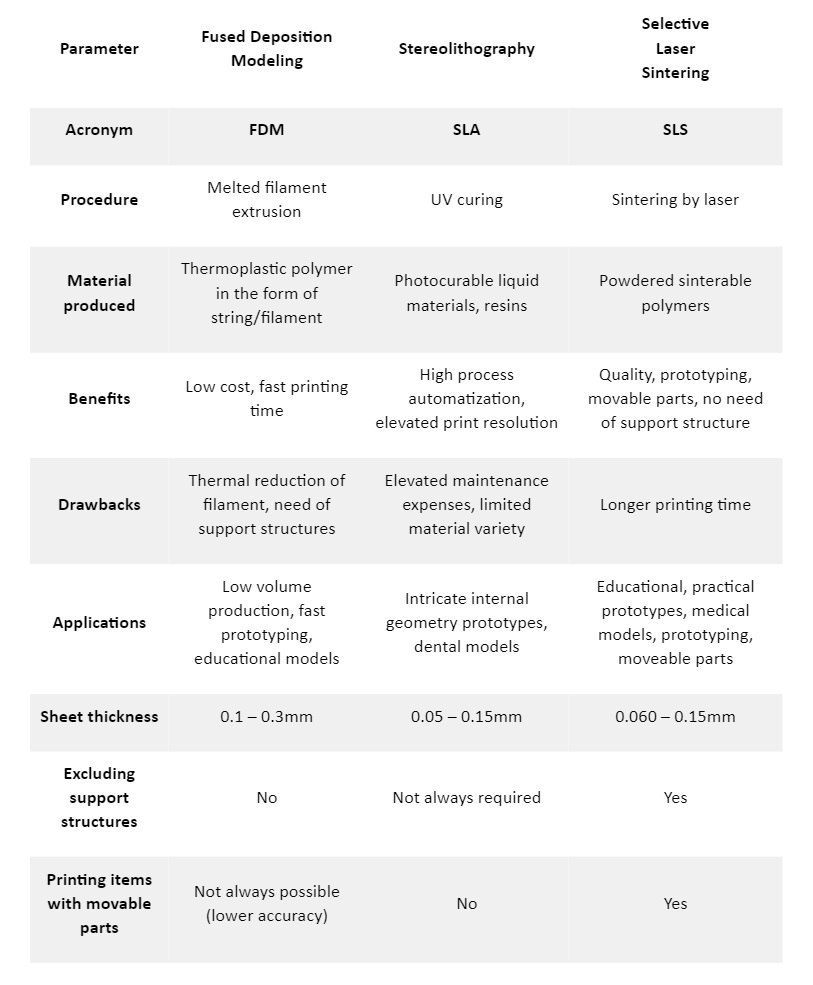
3D Printing Practices Comparison
In Conclusion
3D printing popularity has grown over recent years and manufacturing objects at home both as a hobby, side hustle, or as an employment comes with various advantages like obtaining a swifter manufacturing process and rapid prototyping, reduction of overall costs, while also simplifying state-of-the-art items and designs.
As we can appreciate by now all three forms of printing and processes described above utilise different types of technologies which produce diverse end products. We recommend that you plan ahead, consider your eventual workflow, decide which materials you will be using, target the right method, and last but definitely not least calculate your budget vis a vis the niche your printing applies for.
Ultimately these necessary evaluations will provide you valuable leverage to best implement your 3D printer setup into your office or home environment.


